2013/14
This tutorial provides an introduction to designing and developing your own class and methods, and explores how such methods are called on objects through the process of message passing. It allows you to augment a view-based iOS app that allows users to add simple fractions, and display the results both as floating-point numbers, as well as fractions. Once complete, you will have a better understanding of Objective-C syntax, and can explore Cocoa.
LABS 1 - OBJECTIVE-C AND THE FOUNDATION FRAMEWORK (13/14)
01/10/2013

Introduction
The aim of this tutorial is to familiarise yourself with the tools you will use to develop apps, including the Xcode editor and compiler, and to also find out about the other resource files that may accompany an app, but looking at a partially complete but compilable project. You will then need to implement a new “fraction” class and methods, before integrating them into the code and completing the app’s functionality.
Note that the lab is split into two sections (Lab 1’s tasks and Lab 2’s tasks). These are guides to help you plan your work - if you fail to complete one of the lab’s tasks in a given week, it is probably a good idea to find time to catch up before the following week. If you get all the work done, then great - take a look to see if the following week's labs are available.
Lab 1’s Tasks:
Walkthrough - Step 1: Download, unpack and load the project.
Begin by downloading the FractionPickerV1.zip file and unpacking it in your working directory. You will see a directory called FractionPicker with two items, a second directory with the same name, and a file called FractionPicker.xcodeProj. Double click on this file, to open it in xCode.
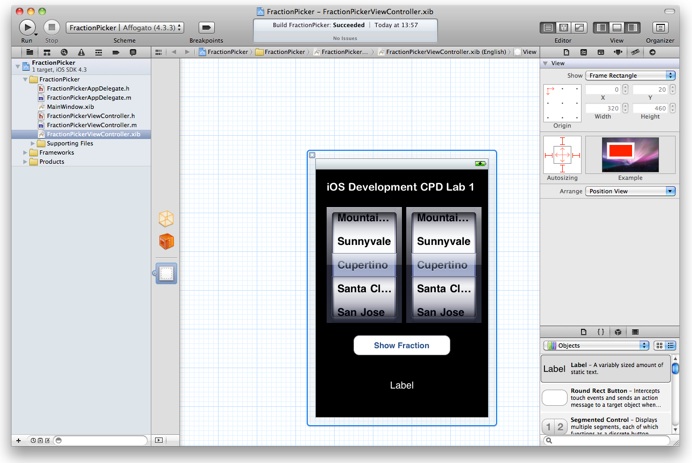
In Xcode, you should see the interface of an application or something similar (if not, try clicking on the lower of the three icons to the left of the central display). This interface corresponds to the .xib file (commonly referred to as the NIb for historical reasons), which was constructed as part of the application. You should see this file highlighted to the left of the main screen.
Start by clicking on the “Run” button in the top left of the screen;
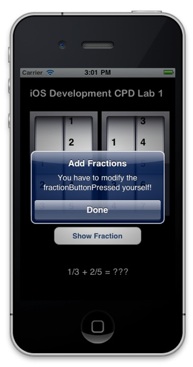
The app should compile and the simulator should start up. You’ll see two sets of scroll wheels (known as pickers), each of which allow you to define a fraction. When a fraction is selected, it will appear in the label near the bottom of the screen. If you then click on the “Show Fraction” Button, this will then create an alert which you can close.
Walkthrough - Step 2: Implement the fraction class.
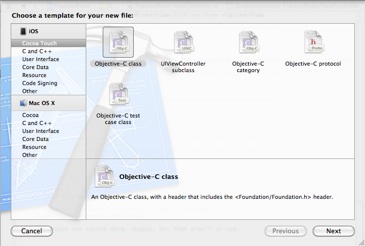
The next step is to create the Fraction Class. Start by going to the top screen menu, and selecting “File/New”, and then selecting New File. A menu will appear, offering a number of different options. You want to create a new Objective-C class for Cocoa Touch.
Click the “Next” button, and ensure that the class will be a subclass of NSObject. Save the class with the name Fraction (note the use of upper case - traditionally class names start with an upper case character). You should now see two files appear, Fraction.m and Fraction .h; it is these files that we will now modify.
Edit the Fraction.h class and define two ints, called numerator and denominator, within the class header. We will then define the accessor methods. In Objective C 2.0, accessor methods can be quickly defined using properties; however, for now we will create them by hand. Add the following method definitions listed in the code fragment below:
//
// Fraction.h
// FractionPicker
//
// Created by Terry Payne on 06/06/2011.
// Copyright 2011 University of Liverpool. All rights reserved.
//
#import <Foundation/Foundation.h>
@interface Fraction : NSObject {
int numerator;
int denominator;
}
- (void) setNumerator: (int) n;
- (void) setDenominator: (int) d;
- (int) numerator;
- (int) denominator;
- (void) setTo: (int) n over: (int) d;
@end
Go to the Fraction.m file and create the corresponding methods. Check the notes on Objective-C (LS3: Objective C & Foundation ) if you are not sure what to do - alternatively; take a look at the Fraction files included in the complete version of the project (at the end).
Walkthrough - Step 3.
Several other files exist within the project, with the main source listed under the FractionPicker directory. You’ll see two main pairs of files. The FractionPickerAppDelegate files correspond to the delegate that the application calls in response to events such as loading, going into the background (or returning to the foreground), and prior to termination. You’ll find out more about this delegate in the upcoming lectures.
The FractionPickerViewController pair contain the code that you will modify. Take a look at it. The header file defines a number of iVars and their types. You’ll see a number of “@property” definitions; you’ll find out soon how these are used to automatically create accessor methods, but for now, focus on the ivars within the FractionPickerViewController Class. The aim of this tutorial is for you to create a Fraction class, and replace the two sets of numerator and denominator iVars. You’ll then add methods which can be used to create and add fractions.
If you look at the FractionPickerViewController implementation file, you’ll notice a number of methods that have been defined. Several of these are defined when the project is created; others have been added to manage the interface elements in the nib file.
Go to the FractionPickerViewController.h file, and modify this to replace the instantiations of the numerator and denominator ivars. Instead, declare pointers to Fractions as listed below. Remember to import the Fraction.h file in your header file (using quotes, not angled brackets), so that the compiler knows what the Fraction class is.
#import <UIKit/UIKit.h>
#import "Fraction.h"
#define NUMBER_OF_PICKER_COMPONENTS 2
#define MAX_NUMBER_ON_PICKER 9
#define NUMERATOR 0
#define DENOMINATOR 1
@interface FractionPickerViewController : UIViewController <UIPickerViewDelegate, UIPickerViewDataSource> {
// Set up view GUI objects
UIPickerView *fraction1PickerView;
UIPickerView *fraction2PickerView;
UILabel *fractionLabel;
UIButton *showFractionButton;
Fraction *myFraction1;
Fraction *myFraction2;
}
If you then go to the FractionPickerViewController.m file, you’ll notice that Xcode 4 has already noticed that the old variables are now invalid. You need to remove these and instead use the new ivars and associated method. In addition, you will need to create the instances somewhere, and free up the memory when they are no longer needed. One possible place to initialise such things is within the viewDidLoad method:
- (void)viewDidLoad
{
[super viewDidLoad];
myFraction1 = [[Fraction alloc] init];
[myFraction1 setTo:1 over:1];
myFraction2 = [[Fraction alloc] init];
[myFraction2 setTo:1 over:1];
[self updateFractionLabel];
}
Also modify the dealloc method to release the two fraction instances. Ensure this is done before calling dealloc on super!
Compile the code and verify that it compiles correctly.
Walkthrough - Step 4: Creating string representations of fractions.
The next task is to extend the Fraction class so that it can take a fraction and add it to another, and also to generate a double precision floating point equivalent from the fraction. In addition, we will modify the view controller so that when the button in the interface is pressed, it results in the two fractions being added, and the numeric value of that new fraction (in addition to the fraction itself) being displayed.
Before addressing the fraction addition, we will start by adding two new methods to the fraction class. The first simply returns the numeric value of that new fraction (as a double), and the second generates a string representing the fraction. This will simplify displaying fraction values. Look through the code, and make sure you understand what is going on. Then add the corresponding method declarations to the header file.
- (double) convertToNum {
if (denominator != 0)
return (double) numerator / denominator;
else
return 1.0;
}
- (NSString *) convertToString {
// Start by checking if the numerator is greater than the denominator - if
// so, then we want to include a number and generate the remainder as a fraction.
// Start by creating a new string. We want to maintain ownership... for now!
NSString *myStr = [NSString alloc];
if (numerator >= denominator) {
if ((numerator % denominator) != 0) {
myStr = [myStr initWithFormat:@"%d %d/%d",
(numerator / denominator), (numerator % denominator), denominator];
} else {
myStr = [myStr initWithFormat:@"%d", (numerator / denominator)];
}
} else {
myStr = [myStr initWithFormat:@"%d/%d", numerator, denominator];
}
// However, we do't want the caller to worry about ownership, so lets autorelease
// the string for now - this will be clearer later in the module
[myStr autorelease];
return myStr;
}
Modify the updateFractionLabel method in FractionPickerViewController.m to generate fractionStr by using the convertToString method calls.
NSString *fractionStr = [NSString stringWithFormat:@"%@ + %@ = ???",
[myFraction1 convertToString], [myFraction2 convertToString]];
We now want to allow for the fractions to be added. The following methods allow a fraction to to be added, and also reduce the results.
- (void) reduce {
int u = numerator;
int v = denominator;
int temp;
while (v!=0) {
temp = u%v;
u=v;
v=temp;
}
numerator /= u;
denominator /= u;
}
- (void) add: (Fraction *)f {
numerator = (numerator * [f denominator]) +
(denominator * [f numerator]);
denominator = denominator * [f denominator];
[self reduce];
}
Again, ensure that the header file Fraction.h is updated.
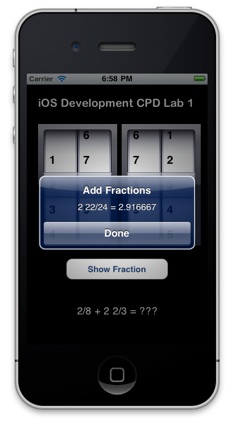
Finally, we now need to create one further fraction called myAddedFraction in the view controller class, which we can use to store that result of adding two fractions. Once this has been created, modify the fractionButtonPressed method to add the two fractions, and then print out the result in an alert box as follows:
- (IBAction)fractionButtonPressed:(id)sender{
[myAddedFraction setTo:[myFraction1 numerator] over:[myFraction1 denominator]];
[myAddedFraction add:myFraction2];
NSString *msgStr = [NSString stringWithFormat:@"%@ = %f",
[myAddedFraction convertToString],
[myAddedFraction convertToNum]];
UIAlertView *alert = [[UIAlertView alloc] initWithTitle:@"Add Fractions"
message:msgStr
delegate:self
cancelButtonTitle:@"Done"
otherButtonTitles: nil];
[alert show];
[alert release];
}
Additional Tasks
Take a look at the code, to understand what is going on when you manipulate the fractions. Explore how the code could be improved; for example, how could the result of the addition be displayed on the bottom-most label, and how could the fractions be reduced when they are displayed in that label.
Full Code
A zip file of the complete project is available from here.